前回の記事【解決】画面にOCRをかけて文字を抽出したい!(1)により,スクリーンショットとOCRで簡単に画面上のテキストを取得できるようになりました。
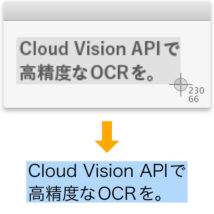
しかし,実はこの話はGoogle Cloud Vision APIのOCR認識精度がもの凄く高くて便利だなーというところから始まっています。
せっかくなのでそのすごいAPIを呼び出すものも紹介します。ただし,今回はAPI Key(利用者アカウントみたいなもの)を自力で取れる方が対象です。我こそはという方は続きをどうぞ。
Google Cloud Vision APIとは
Googleが提供している画像分析サービスです。画像の内容を認識して「これは花だ」と分類したり,「ここが顔だ」という情報を取得したりできます。
今回はテキスト検出(Text Detection)を利用して文字データを取り出します。
残念ながらこのAPIは完全に無料ではありません。2022年7月9日現在,テキスト検出機能は月最初の1,000回まで無料,以降1,000回(月あたり)ごとに1.50USDとなっています。意外と安い!
ちなみに500万回以上は1,000回ごとに0.60USDだそうです(料金表・料金計算ツール)。
また,使うためにはAPI Keyという利用者アカウントのようなものを発行し,クレジットカードやデビットカードを登録する必要があります。私はVプリカというプリペイドカードで登録しようとして弾かれてしまいました。信用情報も重要ということですね。
いずれにせよGoogleのサービスはあっという間に仕様が変わるので,利用する場合はご自身で常に最新の情報を確かめることをお勧めします。
下準備
まずはAPI Keyを取得して有効化する必要がありますが,この記事で細かい手順は解説しません。以下のサイトがわかりやすかったので,参考にしながら手続きをしてください。
Cloud Vision APIの使い方まとめ (サンプルコード付き)
次にAutomatorサービスを使えるようにします。こちらのファイルをダウンロードしてください。
2022.07.09更新
動いているのにクリップボードが空になる現象を解決しました。修正済みのv1.0.3をご利用ください。
2019.07.16更新
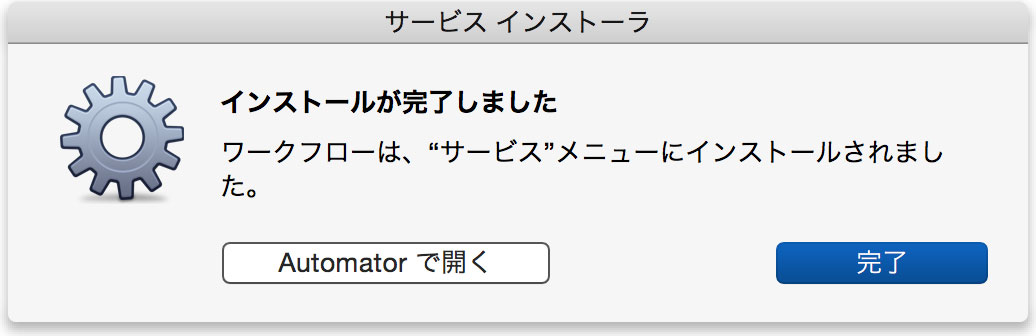
do_OCR.scptとshotOCR_Google.workflow,shotOCR_Google.kmmacrosの3つが入っています。
shotOCR_Googleのほうを開いてインストールしてください。インストールができたら「Automator で開く」を選びます。
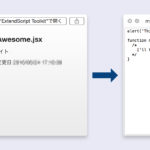
shotOCR_Googleは,中でdo_OCR.scptを呼び出す仕組みです(※前回の記事のようにワークフローで直接AppleScriptを実行したらエラーになりました)。なのでdo_OCR.scptファイルのパスを入力します。API Keyもここで書いて指定します。下のコメントに従って入力してください。
|
1 2 3 4 5 6 7 8 |
-- (例)set script_path to "/Users/sttk3/Desktop/do_OCR.scpt" as text set script_path to "文字を消して,ここにscptファイルをドロップ" as text -- 取得したAPI Keyを下の""の間に入れる。(例)set api_key to "my-api-key" as text set api_key to "" as text set script_file to (script_path as POSIX file) as alias run script script_file with parameters api_key |
保存したら準備はこれで完了です。
使いかた
サービスを実行するとスクリーンショットが起動するので,撮る領域を指定してください。数秒待つと文字認識が終わり,クリップボードに文字が入ります。
なんて優秀なんでしょうか!
注意点
そんな便利なAPIですが弱点もあります。インターネットで画像を送信するサービスだけに,結構な通信容量を消費することです。特にテザリングで接続しているときなどは,すぐにスピード制限されたり通信料金が増えたりするのでお気をつけください。
これでまた少し仕事が速くなりました。今日もさっさと仕事を切り上げて好きなことをしましょう!
シリーズ記事:
- 【解決】画面にOCRをかけて文字を抽出したい!(1)
- 【解決】画面にOCRをかけて文字を抽出したい!(2)
- 【解決】画面にOCRをかけて文字を抽出したい!(3)
参考にしました。ありがとうございます。
スクリーンショットでOCR – Qiita
GoogleのCloud Vision APIをrubyで実装してrakeタスクにしたった – Qiita
コードはこちら
|
1 2 3 4 5 6 7 8 9 10 11 12 13 14 15 16 17 18 19 20 21 22 23 24 25 26 27 28 29 30 31 32 33 34 35 36 37 38 39 40 41 42 43 44 45 46 47 48 49 50 51 52 53 54 55 56 57 58 59 60 61 62 63 64 65 66 67 68 69 70 71 72 73 74 75 76 77 78 79 80 81 82 83 84 85 86 87 88 89 90 91 92 93 94 95 96 97 98 99 100 101 102 103 104 105 106 107 108 109 110 111 112 113 114 115 116 117 118 119 120 121 122 123 124 125 126 127 128 129 130 131 132 133 134 135 136 137 138 139 140 141 142 143 144 145 146 147 148 149 150 151 152 153 154 155 156 |
(* スクリーンショットを撮り,Google Cloud Vision APIでOCRをかけるAppleScript version 1.0.3 ここにAPI Keyを入力してもよい。 そのままにしておいても,実行時ダイアログで入力できる。 scpt・appなどファイルとして保存している場合なら入力した内容は記憶される。 記憶されたAPI Keyを変えたい場合,このscptファイルを上書き保存すれば記憶は消える。 *) property api_key : "" as text on run argv set cancel_btn_name to "キャンセル" as text -- インターネット接続の簡易確認 if (not (my is_internet_active())) then display dialog "インターネットに接続してください。" buttons {cancel_btn_name} default button 1 end if -- 引数つきで実行した場合はそれをapi_keyとみなす(引数がないときargvにはscriptが入る) if (class of argv is not script) then set api_key to argv as text end if -- api_keyがカラの場合ダイアログにてセットする if (api_key is "") then set do_repeat to true else set do_repeat to false end if repeat while (do_repeat) set api_key to text returned of (display dialog "Google Cloud Vision APIのAPIキーを入力してください。" default answer "") if (api_key is not "") then set do_repeat to false end repeat -- temporary itemsフォルダにスクリーンショットを保存する。通信容量節約のためグレースケール化も実行 set temp_folder to POSIX path of (path to temporary items) set capture_path to temp_folder & "sttk3_ocr.png" set quoted_path to quoted form of capture_path set capture_com to "screencapture -srx -t png " & quoted_path & " ; sips -m '/System/Library/ColorSync/Profiles/Generic Gray Profile.icc' " & quoted_path try do shell script capture_com on error return end try set captured_file to (capture_path as POSIX file) as alias -- 画像の容量が4MBを越える場合止める。4MBはAPIの制限 tell application "System Events" to set file_size to size of captured_file if (file_size > 4000000) then my delete_file(captured_file) display dialog "画像の容量が4MBを越えています。軽くしてください。" buttons {cancel_btn_name} default button 1 end if -- OCRにかけて文字を取得し,スクリーンショットは捨てる try set str to my recognize_text_google_api(capture_path, api_key) my delete_file(captured_file) on error error_message number error_number my delete_file(captured_file) display dialog "Error: " & error_number & ". " & error_message buttons {cancel_btn_name} default button 1 end try -- クリップボードに収める set the clipboard to str -- 報告する display notification "結果をクリップボードに入れました。" with title "shotOCR_Google" return str end run (* インターネットに繋げるか簡易チェック。繋げればtrue。 多分ローカルネットワークだけの接続でもtrueを返すので,必ず外部に接続しているかどうかはわからない。 pingは続けて実行すると弾かれるので面倒だった *) on is_internet_active() set res to true set addr to IPv4 address of (system info) -- 127.0.0.1は自身を表すIPアドレス if (addr is "127.0.0.1") then set res to false end if return res end is_internet_active -- RubyでAPIにOCRのリクエストを投げ,認識したテキストを返す。テキストがないときはエラーを返す on recognize_text_google_api(target_path, api_key) set res to "" set post_com to "ruby -Ku -r 'base64' -r 'json' -r 'net/https' -e \"API_URL = 'https://vision.googleapis.com/v1/images:annotate?key=' << " & quoted form of api_key & " # リクエスト用JSONパラメータを生成 body = { requests: [{ image: { content: Base64.strict_encode64(File.new(" & quoted form of target_path & ", 'rb').read) }, features: [ { type: 'DOCUMENT_TEXT_DETECTION', maxResults: 1 } ], imageContext: { languageHints: ['ja'] } }] }.to_json # Google Cloud Vision APIにリクエストを投げる begin uri = URI.parse(API_URL) https = Net::HTTP.new(uri.host, uri.port) https.use_ssl = true https.open_timeout = 5 https.read_timeout = 20 request = Net::HTTP::Post.new(uri.request_uri) request['Content-Type'] = 'application/json' response = https.request(request, body) rescue => e str = '接続に失敗しました。' raise str end # 結果をHashにする data = JSON.load(response.body) # エラー:おもにAPI Key間違いを想定 if data['responses'].nil? then str = data['error']['message'] raise str end # エラー:文字がない画像を想定 if data['responses'][0].empty? then str = '認識可能な文字がありませんでした。' raise str end # 認識したテキストを出力 str = data['responses'][0]['fullTextAnnotation']['text'].rstrip puts str \"" with timeout of 30 seconds set res to do shell script post_com end timeout return res end recognize_text_google_api -- ファイルをゴミ箱に入れる。即時消したいときはrmでも使うといい on delete_file(target_file) --do shell script ("rm " & quoted form of (POSIX path of target_file)) tell application "Finder" to delete target_file end delete_file |
このサイトで配布しているスクリプトやその他のファイルを,無断で転載・配布・販売することを禁じます。
それらの使用により生じたあらゆる損害について,私どもは責任を負いません。
スクリプトやファイルのダウンロードを行った時点で,上記の規定に同意したとみなします。


コメント